
There are a few different ways in which you can cover your soil during the colder months where you won’t be growing most of your plants. This typically starts at some point during autumn, and continues until some point during spring. This mini post is about covering your soil with a layer of mulch, to go along with the how to mulch video, which can be found here.
How to do it
Decide whether or not you want a layer of cardboard underneath. This year I have done this, as we have a lot of old cardboard sheets. If you are doing this, you’ll want to use non-shiny cardboard, and take off any sellotape and other non-organic things.
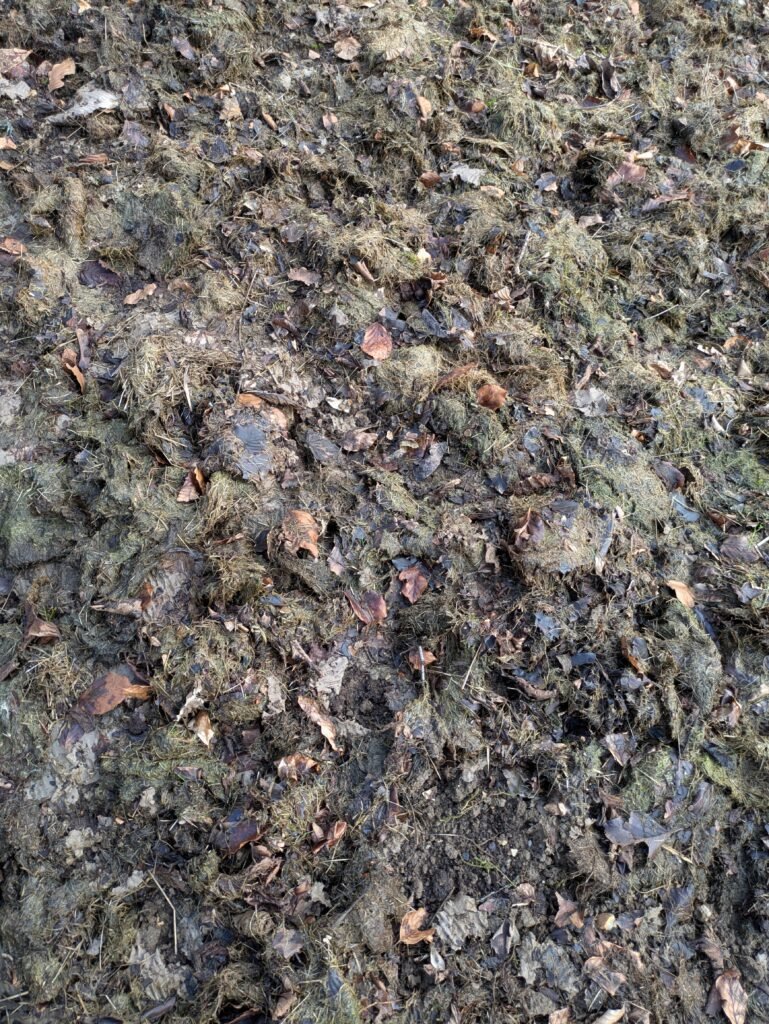
Then gather the materials that you’re going to use as your mulch. This year I have used grass cuttings and fallen leaves as mine. The grass cuttings were being stored underneath some trees, so there were lots of leaves in the pile, which I decided to just use with the grass. You could also use shredded branches from pruned trees. You’ll want to shred these first so that they break down. You can also use plants that you want to compost. You can shred these or keep them whole, but you may need to remove whole ones that haven’t fully rotted down by spring. Things like tomato, squash or corn plants that you’ve pulled up can be good to use. If you have a large amount of already rotted materials, you can also use them. Things like compost or leafmould can be used here.
You can also use straw or bark or other things like that, but most people won’t have these themselves. If you are getting anything from somewhere that isn’t your own garden, check what might have been sprayed on them, as some chemicals will damage your soil.
Now it’s time to cover the ground. If you have chosen to use cardboard, prepare it and then lay it down on the ground. Now either cover the cardboard with your chosen organic matter, or place it directly onto the soil if you aren’t using cardboard. The thickness of this layer will depend on how much you have to use, but try to evenly spread it out, and you want it to at least cover the soil so that you can’t see any or much soil. Visible soil will mean that weeds can grow. If you are using multiple materials, the one that will take the longest to break down should go on the bottom layer, to speed up that process.
The benefits of this method
Weed suppression
A layer of mulch on the top of the soil will prevent most weeds from growing. It can be even more effective if you place a layer of cardboard down below the mulch. You want to prevent weeds from growing as they can compete with plants for water and nutrients. When you dig up a weed, if you don’t dig it into the soil, then you’ve removed nutrients from the soil, as weeds use nutrients to grow. Stopping the weeds growing in the first place can stop this happening.
Soil improvement
Covering the top layer of soil can prevent soil erosion, meaning you keep nutrients in the soil. You are also adding organic matter to the soil once you dig it in (or leave it to break down as the top layer), which adds nutrients. If you dig it in once rotted, it can also improve aeration and water retention.
Crate a habitat
Insects hibernate during winter. They may choose the organic matter on top of the soil to hide in. It also provides habitat for spiders and other insects that might be active during this time of year. Some of these species will be beneficial to you, either pollinating plants or being predators for pests. For others, they will be a food source for birds and other animals. I frequently see blackbirds in the garden digging through the mulch.


Leave a Reply